Thursday, October 20, 2011

potion labels tutorial {free printables}


If you're like me, you've seen a lot of black and white as well as vintage Halloween decor around. I have been loving it and had to have at least part of my house done up that way.
I have seen some great potion bottles with labels out there. But I am a cheap-skate and didn't want to pay for them, especially if they weren't the perfect size for the bottle I have been saving as I've been using things. So here's a few steps to help you get the look with a black and white print from your home computer on just plain old copy paper.

You'll need:
4 bottles (I used a spice bottle, nutella spread, jelly jar, and a Disney vitamin bottle)
Printable (snag it from below)
Coffee or Tea (I used herbal tea water)
Modpodge
Black Spray Paint

Clean your bottles. I put them in the dishwasher. If there is still some residue left use Goof-Off." A little goes a long way.

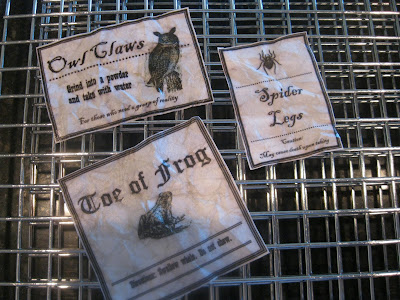
Cut out your printables and crumple them up, then open them back up.


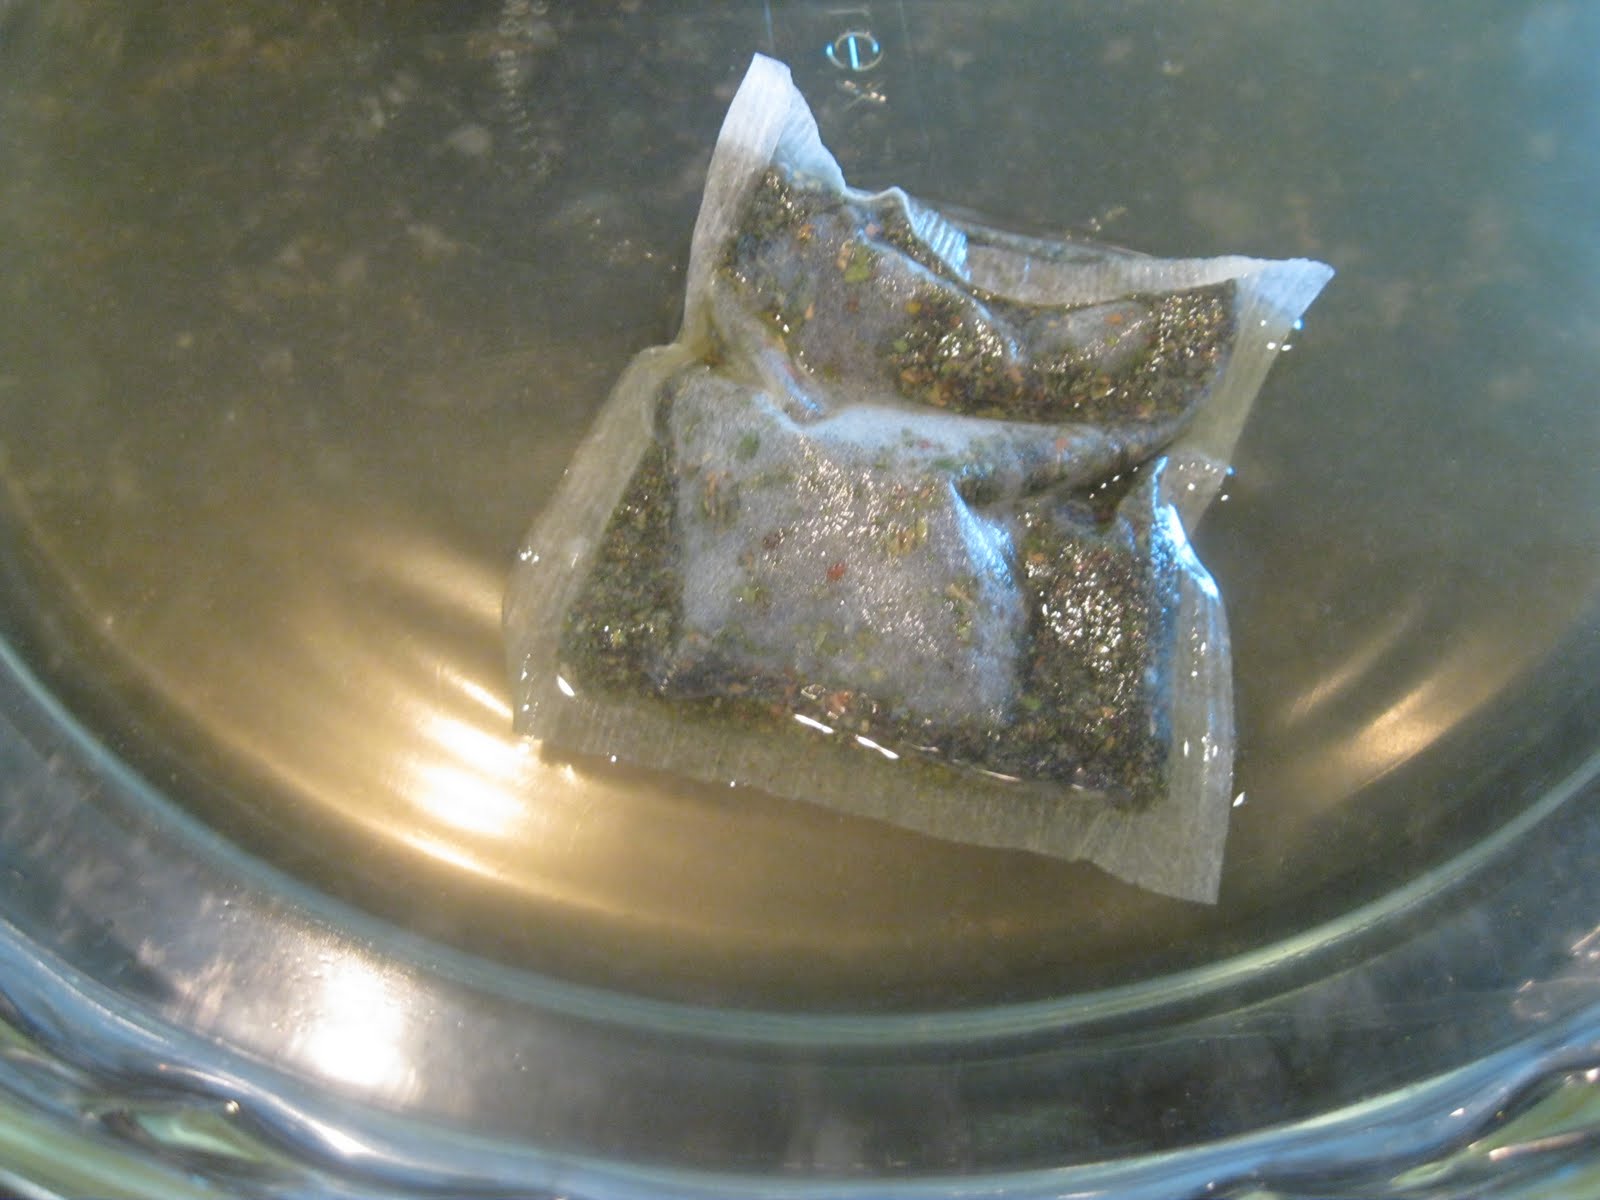
Make your coffee or tea (if using tea, you don't have to make a whole cup, the less water the stronger the tint). Making it in a dish helps make it easier.

Uncrumple the labels and quickly place them in the tea face down. Dip and remove quickly...seriously.

Take them out and place them on a cooling rack. Let them sit there until the ink has bled to your taste.


To help them dry faster and keep their crumpled look, hold label in your hand and blow dry it with a blow dryer. Dry both sides.

Modpodge label on your bottle. I painted a layer over the top to act as a sealer.

Spray paint your lids.

...and display!

Just click and snag.

If you want to try to create your own...click here for the great clip art I used. And here's the labels that inspired mine.
Tip Junkie handmade projects

Wednesday, October 19, 2011

h-a-l-l-o-w-e-e-n

It's amazing how cute those letters can look! I saw theseblocks and had to have them, but not without my own twist (of course!). I printed out her original letters and modpodged them on the back so that if I decide I don't want the purple and green later, all I have to do it turn them around.
Love them!

Here's her printables, but with the color changes I made, just in case you wanted a little more color too.


After making these I of course had to have some fun scallop banners to add a little more color around the house. I got the pattern here.

Tuesday, October 18, 2011

say it with a banner

Just like everyone else, I love me a good banner. I am so happy with how these turned out. Using my cricut and the "Happy Hauntings" cartridge, I was able to make these cute banners.
I love when all I have to do it glue! :) For a little extra I embossed the paper behind the letters with a spider web pattern. It's the little things that make me the happiest! :)


Monday, October 17, 2011

halloween bingo {cutest ever}

I try to just showcase my own work, or at least my version of something I saw, but I had to sahre this halloween bingo I found. I love how "kid friendly" it is. It literally is "happy" halloween.
We are having a great time playing it!

Saturday, October 15, 2011

mummy can {remote holder}

With just a no10 can, about 4-1.5in strips of white broad cloth, some dots of hot (or cool) glue, and some black felt you can create this cute remote holder. My kids love this mummy. It cost less than $1 to make, easy to do with kids, and looks cute.
Now we just have to get my younger one to realize the difference between a "mommy" and a "mummy'! :)

(If you are going to make this make sure to not glue it the whole way. Just start and stop each strip with a dot of glue. This will give it the loose wrapped look. Also, on the last strip I left some end on the beginning and end of the strip around the "ear" location.)

Sunday, October 9, 2011

halloween tree and lanterns


Christmas gets a tree, so Halloween should too! I love me tree! I had been looking for ideas to spark my imagination and this is what did it.
I must admit that modpodging ornaments and painting them was just as fun and it was messy. The best thing about crafts like these it that my kids love them just as much as I do.


The lanterns have started to pop up all over the place, at least the pumpkins and ghosts, but I just had to have a spider and Frankenstein as well. Franky is my favorite. The spider doesn't light up as well, but it just as cute. I just glued some pipe cleaner to the bottom and got the look I wanted. This was simple. Just some jars, modpodge, tissue paper and floss for the faces. I love that my kids want them lit every night. That makes it all worth it.


(if you like the printable you can grab it from me here-I love when I can reference myself!) :)

Friday, October 7, 2011

witch's hat centerpiece

I saw this type of idea in someone's home and so I of course had to have it. I found a great witch's hat a Wal-Mart for under $10, but it was purple...so all I needed was a little black spray paint.
I ABSOLUTELY LOVE LOVE LOVE it. I placed it on a cake stand and Boom! there it is!
Give it a try. My son puts his little black rat under the toole and it looks really cool.
Love how simple, yet elegant it looks. That's my new look I decided... :)

Wednesday, October 5, 2011

halloween in print {free printables}

I'm proud to say that I love how this turned out. I needed a little something to finally take out my "Land that I Love" prints...yes, I know it's October...It is beautiful and simplistic. Hope you like it just as much....
as always...just click and snag it.


I needed something to go above my lanterns and next to my Halloween tree. I say this one, but was not totally in love, so this cutie was born. I love how it turned out. Click and grab it, which ever direction you would like.


I got this idea from HGTV. They have a great selection of great black and white Halloween decor. My house is split. My front, formal, part of my house is black and white and the rest, where we mainly do our living, is fun and colorful.