It is something that I will probably never do again in my life so I went way out with the little bit of decor I could. Definitely a morning to remember! :)
Friday, April 29, 2011
royal wedding party
A great friend of mine threw an small Royal Wedding party and I got WAY into it. We watched it live, yes at 3 in the morning. We got all jeweled up and had a beautiful breakfast.
It is something that I will probably never do again in my life so I went way out with the little bit of decor I could. Definitely a morning to remember! :)


It is something that I will probably never do again in my life so I went way out with the little bit of decor I could. Definitely a morning to remember! :)
Tuesday, April 26, 2011
disney shirts
My good friend Rebbecca was taking her family to Disneyland for a week since her husband was coming home from Afghanistan, so I just had to make her two little girls some shirt for the occasion. I really LOVE how they turned out. I didn't have a Disney cricut cartridge, so I just used circles to make the Mickey silhouette and then sewed a ribbon bow on to make them look like Minnie.

Making these shirts reminded me of our fun Disney world trip we took and the fun shirts I made for the trip. It all started with the "big brother" "little brother" shirts since we get twin comments daily because our boys look so alike and are the same size.

Those lead to the Mickey tie-dye shirts that I loved. It was easy, cheap, and fun. I just penciled a Mickey silhouette on the front and back. Then I gathered those circles and tied them tight with rubber bands. Then I dyed them in black die (I didn't leave them in long enough!). Then let them dry, took the rubber bands off, washed them and then used freezer paper with my cricut to do the lettering.

And those lead to the fact that their uncle would be having a birthday while we were there, and I just had to make him a cheesy shirt to wear! :) I am most proud of this one. It was a little tricky to make my boy's faces, but well worth the effort. I did it my taping a piece of paper to my computer and tracing the shadows of a picture of them that was on the screen. I them razor cut them out on freezer paper and ironed that on the shirt and painted over it. I was very impressed with myself! :)
Making these shirts reminded me of our fun Disney world trip we took and the fun shirts I made for the trip. It all started with the "big brother" "little brother" shirts since we get twin comments daily because our boys look so alike and are the same size.
Those lead to the Mickey tie-dye shirts that I loved. It was easy, cheap, and fun. I just penciled a Mickey silhouette on the front and back. Then I gathered those circles and tied them tight with rubber bands. Then I dyed them in black die (I didn't leave them in long enough!). Then let them dry, took the rubber bands off, washed them and then used freezer paper with my cricut to do the lettering.
And those lead to the fact that their uncle would be having a birthday while we were there, and I just had to make him a cheesy shirt to wear! :) I am most proud of this one. It was a little tricky to make my boy's faces, but well worth the effort. I did it my taping a piece of paper to my computer and tracing the shadows of a picture of them that was on the screen. I them razor cut them out on freezer paper and ironed that on the shirt and painted over it. I was very impressed with myself! :)
Sunday, April 24, 2011
easter in full bloom
I, sadly, didn't get to play around with Easter crafts as I would have loved this year due to my back going out. Thankfully I am usually ahead of the game as far as holidays go so that when it snuck up on me there wasn't too much I had to finish up. So here they are. This year's goodies....
These were Styrofoam eggs that I pinned circles on to. I was inspired my these. If doing this you need to start at the narrower end of the egg or else it will look like a pine cone when you are done.....yes, I learned that one the hard way! :)

These fabric covered eggs are so easy, fast, and messy! :) I just cut strips from some of my fabric scraps and mod-podged them on plastic eggs. I was inspired by these here.


These eggs just kind of came together. I got this great rabbit from my mom and I needed something to go with it. I had thought out newspaper and then I say these eggs here. That lead to twine, which lead to music covered eggs as well. I love vintage music paper right now, so I am sure I will find ways to use it again soon. There were just plastic eggs are well that I covered. I love how they turned out. They don't really match any of my other Easter decor, so they have a great home in my upstairs hall.

I had to make and "insect" egg frame as well. It was too simple not to. I cut the glitter egg in half to make it look cracked. It turned our great. I saw these yarn-covered carrots here and had to do them. They took a while to wined, but they were so cute that they were worth it.

Here is one of the Easter banners I made this year. I still can't decide which one I like best, but this one turned out cute.


And lastly, this egg garland that was made from paint-chip cards (that are free I might add!) is SOOOO cute. I stole the idea from here. They look so cute and fun in my kid's playroom. I made one for each of the window that mirror each other in there.
These were Styrofoam eggs that I pinned circles on to. I was inspired my these. If doing this you need to start at the narrower end of the egg or else it will look like a pine cone when you are done.....yes, I learned that one the hard way! :)
These fabric covered eggs are so easy, fast, and messy! :) I just cut strips from some of my fabric scraps and mod-podged them on plastic eggs. I was inspired by these here.
These eggs just kind of came together. I got this great rabbit from my mom and I needed something to go with it. I had thought out newspaper and then I say these eggs here. That lead to twine, which lead to music covered eggs as well. I love vintage music paper right now, so I am sure I will find ways to use it again soon. There were just plastic eggs are well that I covered. I love how they turned out. They don't really match any of my other Easter decor, so they have a great home in my upstairs hall.
I had to make and "insect" egg frame as well. It was too simple not to. I cut the glitter egg in half to make it look cracked. It turned our great. I saw these yarn-covered carrots here and had to do them. They took a while to wined, but they were so cute that they were worth it.
Here is one of the Easter banners I made this year. I still can't decide which one I like best, but this one turned out cute.
And lastly, this egg garland that was made from paint-chip cards (that are free I might add!) is SOOOO cute. I stole the idea from here. They look so cute and fun in my kid's playroom. I made one for each of the window that mirror each other in there.
Saturday, April 23, 2011
kid-friendly egg dying
Friday, April 1, 2011
dressed to impress {in less an hour}
Saturday night was a nice quiet night. We got our kids to bed and took some time to do the things we love to do....which means I didn't work on the piles of unfinished projects I have...I started a new one! :)
I have been intrigued by the "pillow case dress" but have never made one or knew how. So, I decided I was going to figure it out.
I got a dress the size my daughter is in. Got a piece of material,doubled it the width of the bottom of the dress and sewed in into a "tube". I put some ribbons in the top seam where I thought they would need to be and sewed them up. I then sewed another seam about an inch and a half below the top seam for the elastic.
I then snipped a little hole in the inside and inserted it. After pulling it through and seeing the finished product, I decided it needed a little more, so I finally tried out this cute new felt flower I just saw on a blog.
I am so happy with how it turned out. It was so fast (less than an hour, flowers included) and the results were terrific!
I think I might attempt my first tutorial with this soon. I had a few friends at church express their desire to make one....just don't hold your breath for it! :)
Friday, March 18, 2011
eat your greens
Yes, the Leprechauns were at our house and busy at work making everything green and rainbowie for us and boy did we love it!
My kids woke up to a trail of gold leading them to cute St. Patrick's day shirts and a festive breakfast of green pancakes, green butter, and green juice.


For lunch they had friends over and we had a great lunch of green mac 'n cheese and rainbow jell-o. They topped it all off with fun rainbow and gold cupcakes.
Dinner was fun. With fun decor, green enchiladas, green beans, rainbow jell-o and fun cupcakes, how could you go wrong?!

Here's my yummy Creamy Enchilada Recipe. It is SUPER simple and SUPER yummy. I got it from my great sister, who is an amazing cook.
Saute:
2 C shredded chicken
1/2 C chopped onion
2 TLBS butter
Mix:
1 can evaporated milk
1 can cream of chicken soup
1 1/2 C sour cream
1 C shredded cheddar cheese
Dip tortillas in sauce, stuff with meat mixture. Roll. Cover all with 1/2 C shredded cheddar cheese and 1 4 oz can of chopped green chilies. Cover with foil and bake at 350F for 30 minutes. (add green dye to sauce before dipping tortillas to change color)

The jell-o takes A LOT of time, but it's not bad if you have things to do between letting layers set. Needless to say it was a late night on the 16th! :) Get the recipe here.

The cupcakes were SOOOO fun to make. I couldn't find the airhead treat that she used, but these twizzlers were a good alternative. I made them with funfetti cake to give them a rainbow feel.

And these gems were inspired by a friend who did this with oreos for us as a treat for Christmas. It just seemed like it was totally appropriate for an Irish Occasion! :)
My kids woke up to a trail of gold leading them to cute St. Patrick's day shirts and a festive breakfast of green pancakes, green butter, and green juice.
For lunch they had friends over and we had a great lunch of green mac 'n cheese and rainbow jell-o. They topped it all off with fun rainbow and gold cupcakes.
Dinner was fun. With fun decor, green enchiladas, green beans, rainbow jell-o and fun cupcakes, how could you go wrong?!
Here's my yummy Creamy Enchilada Recipe. It is SUPER simple and SUPER yummy. I got it from my great sister, who is an amazing cook.
Saute:
2 C shredded chicken
1/2 C chopped onion
2 TLBS butter
Mix:
1 can evaporated milk
1 can cream of chicken soup
1 1/2 C sour cream
1 C shredded cheddar cheese
Dip tortillas in sauce, stuff with meat mixture. Roll. Cover all with 1/2 C shredded cheddar cheese and 1 4 oz can of chopped green chilies. Cover with foil and bake at 350F for 30 minutes. (add green dye to sauce before dipping tortillas to change color)
The jell-o takes A LOT of time, but it's not bad if you have things to do between letting layers set. Needless to say it was a late night on the 16th! :) Get the recipe here.
The cupcakes were SOOOO fun to make. I couldn't find the airhead treat that she used, but these twizzlers were a good alternative. I made them with funfetti cake to give them a rainbow feel.
And these gems were inspired by a friend who did this with oreos for us as a treat for Christmas. It just seemed like it was totally appropriate for an Irish Occasion! :)
Saturday, March 5, 2011
color me green
So I am still loving all the fun ideas I am finding and coming up with for St. Patrick's Day. It is getting me way excited for the big day and the fun we are going to have around here.
So here's some of my latest....
I saw a picture of this done digitally and couldn't resist making it with real buttons. I LOVE how it turned out. It took a lot of time arranging, but I think that real buttons looks so much more fun.

An ikea born idea, I love how cheap and simple this was. Ikea sells packs of tea candles in colors. Just buy a pack of greens, fill a jar, vase, whatever, and it is a nice touch of green.

Made always has cute ideas, and I loved this one. I love the idea of having a shamrock bean bag toss, but would probably just make them out of green fabric. She made a million of these. One was enough for me. I didn't love sewing on vinyl.

I copied these paper globes that she did for Valentine's day. I love the little touch of green that they add. They were surprisingly easy, but I do suggest that you use your glue gun to assemble them.


I am loving all the free printables out there right now. Tip Junkie is where I find most of mine. She takes me to others sites and I just keep going! :) They are so cute and great for frames, toppers, and party favors. There are cute "kiss me I'm irish" and "keep calm and pinch on" printable that are to die for.
So here's some of my latest....
I saw a picture of this done digitally and couldn't resist making it with real buttons. I LOVE how it turned out. It took a lot of time arranging, but I think that real buttons looks so much more fun.
An ikea born idea, I love how cheap and simple this was. Ikea sells packs of tea candles in colors. Just buy a pack of greens, fill a jar, vase, whatever, and it is a nice touch of green.
Made always has cute ideas, and I loved this one. I love the idea of having a shamrock bean bag toss, but would probably just make them out of green fabric. She made a million of these. One was enough for me. I didn't love sewing on vinyl.
I copied these paper globes that she did for Valentine's day. I love the little touch of green that they add. They were surprisingly easy, but I do suggest that you use your glue gun to assemble them.
I am loving all the free printables out there right now. Tip Junkie is where I find most of mine. She takes me to others sites and I just keep going! :) They are so cute and great for frames, toppers, and party favors. There are cute "kiss me I'm irish" and "keep calm and pinch on" printable that are to die for.
Thursday, February 24, 2011
it's easy being green...
...or so it seems lately.
I LOVE holidays and St. Patrick's Day is no exception, but I only had one thing for the holiday I realized when I went to pull it out. (yes, a gold leafed plate with coins and shamrocks...that's it).

I didn't really decorate for St. Patty's Day because Easter comes so quickly after Valentine's I usually just jump it...but probably not anymore thanks to some fun things I've made.
As usual...some crafts come from my (sometimes) brilliant self, and others are inspired by U. So here's what I've got so far. It was been so fun!
I love banners. They are so cute. This one was done with my cricut using the "Blackletter", "Circus", and "Lovely Floral" Cartridges. I tied it with strips of poly satin. It is so much cheaper than ribbon and it looks great!

I am so in love with these scallop garlands. This pattern was designed by my friend and is from her cute blog here. The two changes I made were that I did not space my scallops an inch apart. I like the way they look right next to each other. I also just made my own bias tape instead of buying some. That way I was able to choose the width and length I wanted. I loved this project because it was so easy and I just used material I already had...so it didn't cost a penny!


The link for the pattern is here

Once I saw this I knew I had to do it. So I got out what I had laying around that I thought would make do...and NO I did not have a canvas laying around. I used a piece of MDF left over from my garage shelving, I doubled up some white material I had and then I stapled it on the wood.
I then used the one stamp set I own and craft paint for the letters. I was VERY happy with how it turned out. In fact I am pleased to say that I like mine more! :)

This was also just inspired by my "i{heart]u" burlap sign I did for Valentine's Day. I figured I could do one for St. Patrick's day too and I love it. I used the "Zooballoo" and "Paper Dolls Dress Up" Cartridge to cut out freezer paper. I used the inverse and then ironed it on the burlap and used more of a "dry brush" technique for the aged look. I love it, but still need to add the next layer. Will post update when that happens.

This "kiss me" is just made from chip board letters I picked up at Hobby Lobby (love that place!). I painted them the color of the glitter I was using, then mod-podged the front and covered the letters with glitter. I then just hot glued it on to a board I painted black and had a groove run through the middle to help hold up the letters. I stole a little shamrock from my amazing gold plate :) as a little accent and I love what the darker green does for it! This was a very fast and cheap project that I think looks great.

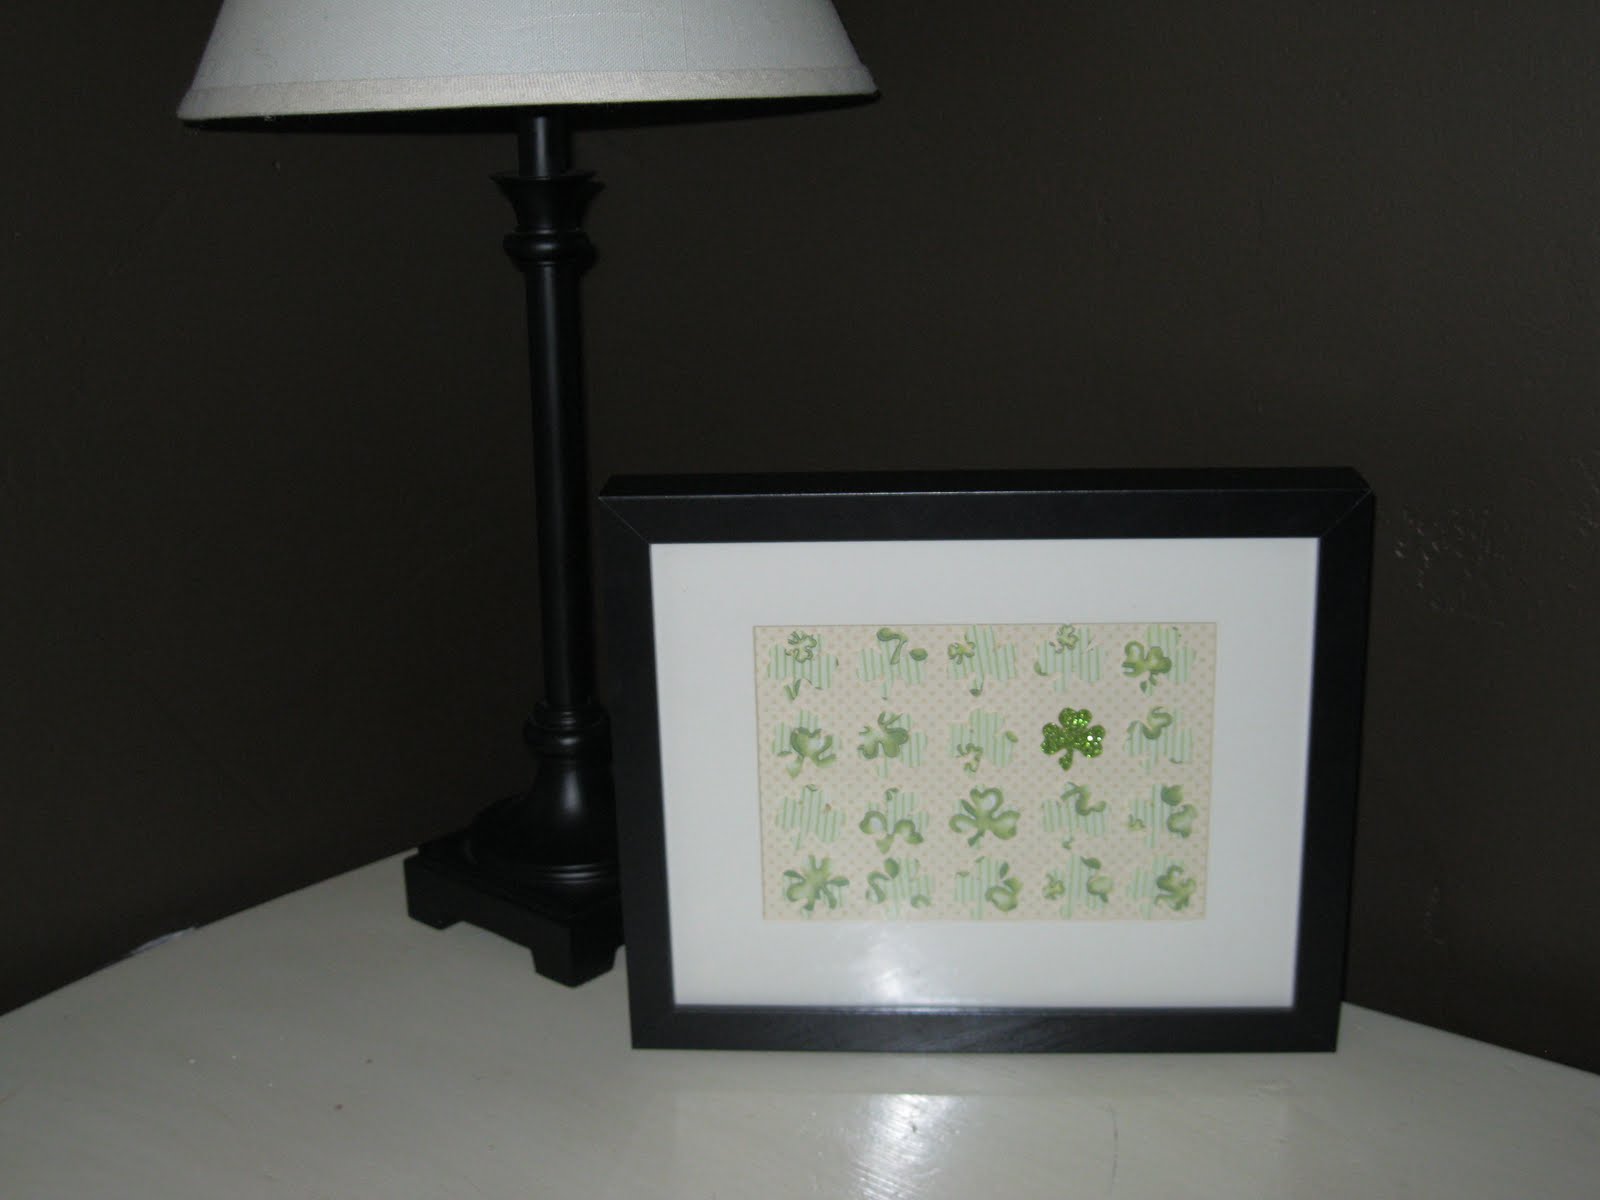
And lastly my "insect" shamrock art. I loved the one I did for Valentine's Day, so I thought I'd give it a try for patty's day too. I am not in love with the print I did the shamrocks on, but my choices were limited. If I find something I LOVE later I might take the time to change it, if not, I like it enough to keep it.


Still on the list are:
1. Attempt to mod-podge a candle using st. patty napkins
2. A table runner with mini scallops on ends to match my garlands
3. A frames shamrock tree
4. "Keep Calm and Pinch on" and "Kiss Me I'm Irish" printables
5. Irish Cookie pops with tags
6. Paper Globes
7. Green Menu for the big day
(oohh, 7 more things to make. Lucky number!) :)
Here's hoping I get to all this fun stuff...and the house work too...but if I don't get to the house work.....! :)
I LOVE holidays and St. Patrick's Day is no exception, but I only had one thing for the holiday I realized when I went to pull it out. (yes, a gold leafed plate with coins and shamrocks...that's it).
I didn't really decorate for St. Patty's Day because Easter comes so quickly after Valentine's I usually just jump it...but probably not anymore thanks to some fun things I've made.
As usual...some crafts come from my (sometimes) brilliant self, and others are inspired by U. So here's what I've got so far. It was been so fun!
I love banners. They are so cute. This one was done with my cricut using the "Blackletter", "Circus", and "Lovely Floral" Cartridges. I tied it with strips of poly satin. It is so much cheaper than ribbon and it looks great!
I am so in love with these scallop garlands. This pattern was designed by my friend and is from her cute blog here. The two changes I made were that I did not space my scallops an inch apart. I like the way they look right next to each other. I also just made my own bias tape instead of buying some. That way I was able to choose the width and length I wanted. I loved this project because it was so easy and I just used material I already had...so it didn't cost a penny!
The link for the pattern is here

Once I saw this I knew I had to do it. So I got out what I had laying around that I thought would make do...and NO I did not have a canvas laying around. I used a piece of MDF left over from my garage shelving, I doubled up some white material I had and then I stapled it on the wood.
I then used the one stamp set I own and craft paint for the letters. I was VERY happy with how it turned out. In fact I am pleased to say that I like mine more! :)
This was also just inspired by my "i{heart]u" burlap sign I did for Valentine's Day. I figured I could do one for St. Patrick's day too and I love it. I used the "Zooballoo" and "Paper Dolls Dress Up" Cartridge to cut out freezer paper. I used the inverse and then ironed it on the burlap and used more of a "dry brush" technique for the aged look. I love it, but still need to add the next layer. Will post update when that happens.
This "kiss me" is just made from chip board letters I picked up at Hobby Lobby (love that place!). I painted them the color of the glitter I was using, then mod-podged the front and covered the letters with glitter. I then just hot glued it on to a board I painted black and had a groove run through the middle to help hold up the letters. I stole a little shamrock from my amazing gold plate :) as a little accent and I love what the darker green does for it! This was a very fast and cheap project that I think looks great.
And lastly my "insect" shamrock art. I loved the one I did for Valentine's Day, so I thought I'd give it a try for patty's day too. I am not in love with the print I did the shamrocks on, but my choices were limited. If I find something I LOVE later I might take the time to change it, if not, I like it enough to keep it.
Still on the list are:
1. Attempt to mod-podge a candle using st. patty napkins
2. A table runner with mini scallops on ends to match my garlands
3. A frames shamrock tree
4. "Keep Calm and Pinch on" and "Kiss Me I'm Irish" printables
5. Irish Cookie pops with tags
6. Paper Globes
7. Green Menu for the big day
(oohh, 7 more things to make. Lucky number!) :)
Here's hoping I get to all this fun stuff...and the house work too...but if I don't get to the house work.....! :)
Wednesday, February 2, 2011
boy's bathroom
I redecorated my boy's bathroom about a year and a half ago. It was just navy and red with lighthouses...not very original, and no personal touch, so I was happy with the change. The best part about it was that all it cost was a few hand towels in different colors and a few frames.
The whole idea came from something I saw on a blog here. I water color with my kids a lot and this activity seemed perfect. I loved the idea of using their art to decorate with. All I had to do was cut out the shapes I wanted and the paste them on to a white piece of paper and then write on them. I picked up some frames to unite them all, and there you go!
The little felt creatures were so fun to make. I just cut them out from felt scraps I had. They were perfect to cover up the little lighthouse hooks I had.
This bathroom still makes me happy to this day....and that's what I call good design! :)
Hope you like it too!

.JPG)
.JPG)
.JPG)
.JPG)
The whole idea came from something I saw on a blog here. I water color with my kids a lot and this activity seemed perfect. I loved the idea of using their art to decorate with. All I had to do was cut out the shapes I wanted and the paste them on to a white piece of paper and then write on them. I picked up some frames to unite them all, and there you go!
The little felt creatures were so fun to make. I just cut them out from felt scraps I had. They were perfect to cover up the little lighthouse hooks I had.
This bathroom still makes me happy to this day....and that's what I call good design! :)
Hope you like it too!
Subscribe to:
Posts (Atom)